How To Use the Go Redmond Calendar
August 25, 2015

Adding trips to your online calendar will measure your financial and environment savings.
Adding trips to your calendar is also how you'll be entered to win rewards!
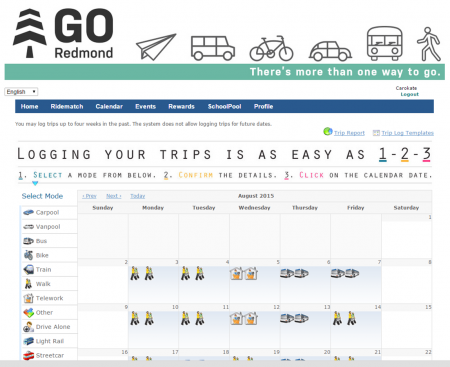
The calendar is a straight forward tool. Once you are logged in to your Go Redmond account, click on "Calendar" along the top menu and then follow these simple steps.
-
Select your travel mode
- All your options are in the left column (walk, telecommute, bus, etc)
-
Confirm the trip details and click "Continue"
- Purpose: was this a commute trip, personal trip, or for your student's school
- Carpool: How many people did you travel with
- Start and end destinations (needed to calculate your impact)
-
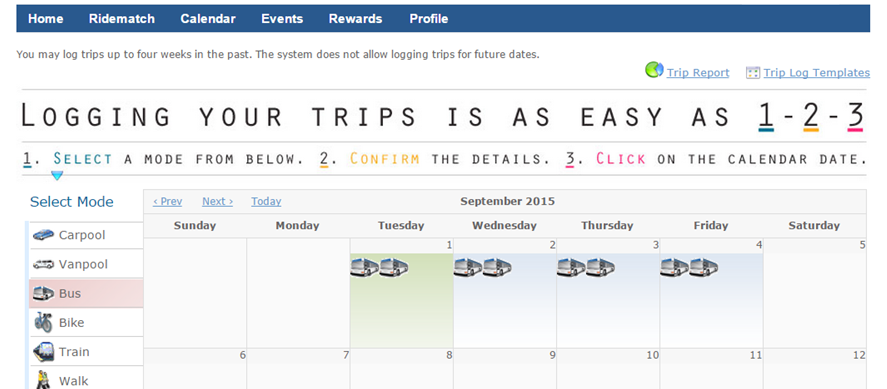
Click the dates you traveled in that mode.
- You can go back up to 30 days to log your commute trips
Congratulations! Your trip has been added!
You will now see your impact under "Achievements" on your main page and your progress towards earning incentives under "Rewards".
Trip Log Template for Recurring Commutes
Setting up a Trip Log template will allow you to automatically add trips to your calendar
-
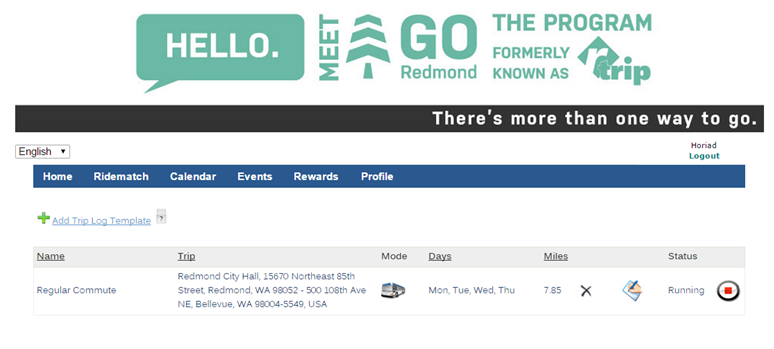
Under the calendar tab, click on "Trip Log Templates"
-
Click "Add Trip Log Template"
-
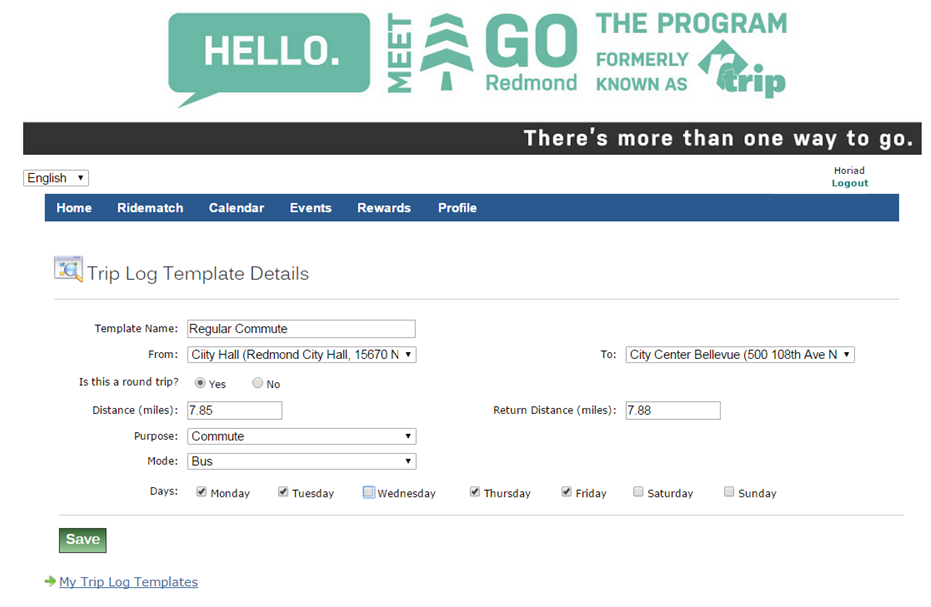
Enter the details of your commute
For instance, if you take the bus every day but Wednesday, you can have your trip log template reflect that.

-
Click "Save"
The Trip Log is now running and will automatically add your commute trips to your calendar. You can pause or cancel it at any time by clicking on "Trip Log Templates." You are able to set up multiple Trip Log Templates to easily add your trips to your calendar.

